step 1: locate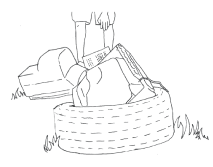 tires are often discarded in abandoned lots and stockpiled at local automotive garages.
tires with steel exposed cannot be repurposed; punctured treads are ok; tread with must be less than 8” in width.
step 2: drainslit sidewalls with a utility knife to release
any fluids collected within tire.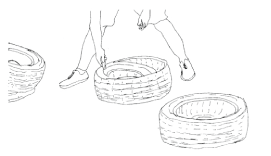 tires found outdoors typically contain water trapped, which becomes a nesting grounds for disease carrying vermin. use a drill to puncture a hole or a utility knife to slit and drain any fluids prior to transport or storage.
step 3: transporthaul illegally discarded tires to project site + store in a weather tight container.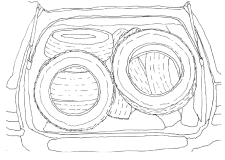 local sources:(3 mi radius) big brother’s tires downtown auto bodyoguis auto caremobile car carerk motors community tires (2 locations) milwaukee tire and batteryup to 200 tires are collected by beintween for no charge from local shops within 5 mile radius, loaded into trailer, and stored in a watertight 40’ high cube shipping container adjacent to the artery at North Side Lumber & Fuel 250 W Capitol Dr. Milwaukee, WI.
step 4: storeidentify illegally discarded tires found among other debris in the vicinity.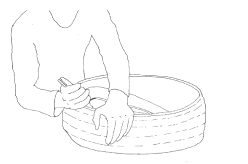 sidewalls are separated from the tire tread outside of container on tabletop, reducing composite tire volume by 8 times for storage within container.a single blade can slice up to 50 sidewalls with ease; time per sidewall removal is 1-2 minutes; minimal crumb rubber is collected for proper disposal.
step 5: sliceslice identify illegally discarded tires found among other debris in the vicinity.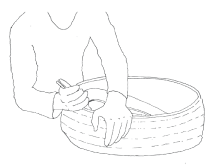 options for repurposing tires: 16 foot totem pole (250 sidewalls)trash receptacle (80 sidewalls)benches (60 + sidewalls) mobius strip seat (40 sidewalls)construction barrel base (1 sidewall)recycled for crumb/fuel (unlimited)once sliced, sidewalls are separated from the treads in piles as byproducts of matireal process. tread ‘rings’ are stored within container, while sidewalls are temporarily stacked out of sight behind container until reuse. gloves mush be worn to protect hands.
step 6: clampsecure the tread to a surface to reduce tires vibration in the following step.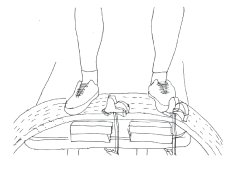 cutting through steel embedded tread is much simpler when vibration is dampened. clamp on either side of the intended cut line. a preferred method involves folding the treat onto itself and a saw horse or otherwise; clamping such that the tire filets as it is being cut is beneficial.quick clamps make this process most efficient; minimal crumb rubber is collected for proper disposal.alternatively, steps 6 + 7 can be omitted in the case of the ‘peanut’ assembly.
step 7: splitcut through the steel bead of the tread with a circular or jig saw.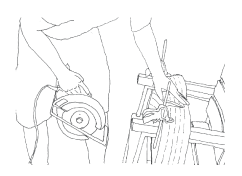 splitting the tread in the traverse direction can be done with a reciprocating or circular saw, though a jig saw reduces vibration and is the safest. glasses and mouth coverage is necessary to prevent loose particles or steel from doing any damage. cutting outdoors is mandatory as the smell of rubber being cut is very strong. wood blades are preferred as the cut faster through rubber; metal blades heat up considerably to the point of snapping.
step 8: fastenarrange treads inside to inside, outside to outside - connect with screws every 12-16”. assemble treads on a flat surface, with desired tread edge (no exposed steel) facing down, ensuring this edge is aligned. once strips of tread are assembled, fasten every other tread to the next by drilling (two) 1 5/8 inch coarse threaded fasteners vertically above one another at a consistent distance apart. fasteners should be no more than 24 inches apart, no less than 16 inches apart, at natural undulations, staggering every row by fastening between the center of each screw in the previous row, or every row beyond in line with rows of fastener two previous.
step 9: shima flexible lattice of steel reinforced treads becomes a structural + permeable geotextile.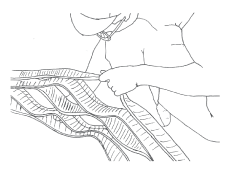 after fastening each, weave should be stretched to identify a fairly consistent spaced geo-textile (as shown on left) to allow for cellular backfilling with aggregate.weave should be flipped over, such that uneven tread heights are on the underside, which allows the top side of the weave to become level.
step 10: compactwalking over it reveals its structure isdirectly related to he density of the weave.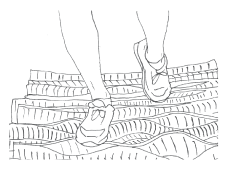 once the composite weave exceeds 12-16 treads, depending on the weight of the weave, try walking over the weave. ensure that no steel mesh is protruding from traversable surface. if this is the case, replace this tread.
step 11: transportinsert spacers between cells to achieve desired density or form.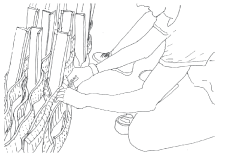 to identify proper cell spacing, insert shims vertically into the weave,temporarily holding the geo-textile open.every 4 treads on average, should measure about 1 foot of weave, with cells between 2-3 inches apart. this will yield a geo-textile which is about 6 feet wide.once spacing is verified, remove shims and compact weave with a strap and transport to site.
step 12: embedset weave into aggregate + backfill to submerge the depth of the tread.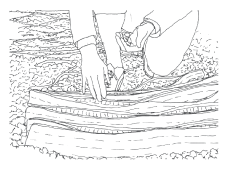 transport compacted weave to the site, setting each composite weave about 42 inches apart.(existing) gravel should be displaced at a depth of 8-10 inches, width of 6 feet, and a length (in the direction of the path) in of 4 feet.